How to Create a Custom GPT in ChatGPT for SEO Outlines and Meta Descriptions
TL;DR: To create a Custom GPT in ChatGPT, open ChatGPT Plus, click “Explore GPTs” then “Create,” describe what you want it to do in plain English, add specific SEO instructions, and save it. No coding required. The process takes under 15 minutes, and you end up with a persistent AI assistant that writes SEO outlines and meta descriptions exactly the way you want, every single time.
Every week I write and brief content. And every week, before I could actually get useful output from ChatGPT, I’d paste the same 400-word context block: my keyword rules, my heading preferences, my character limits for meta tags. Same text, every session, because ChatGPT forgets everything when you close the tab.
That changed when OpenAI introduced Custom GPTs. I built one for SEO content outlines in under 15 minutes, and I built a separate one for meta titles and descriptions. Now I open either GPT, type a keyword, and get properly structured output in seconds, with zero context pasting.
This guide shows you exactly how I built both. You’ll see the actual instructions I used, the settings that matter, and how to test that your GPT behaves the way you actually want.
For more on using AI for keyword research, see my ChatGPT prompts for SEO keyword research guide. The two tools pair well together.
What Is a Custom GPT?
A Custom GPT is a saved, personalized version of ChatGPT that you configure with specific instructions, a persona, and an optional knowledge base. Every conversation starts with that configuration already loaded, so you never need to paste context again.
Think of it as a ChatGPT instance that already knows your rules. You tell it what to do, how to format output, what tone to use, which SEO guidelines to follow, and what to avoid. Save it once. Come back to it whenever you need it.
OpenAI launched Custom GPTs in November 2023 alongside GPT Builder, their no-code creation interface. There are now over 3 million public GPTs in the GPT Store. Most of them are generic. The ones that actually save time are the narrow, specific ones built for a single repeatable task, which is exactly what we’re building here.
How Custom GPTs Differ from Regular ChatGPT
In a regular ChatGPT session, context disappears when you close the tab. Every new conversation starts blank. If you need the GPT to follow your SEO format, you paste the instructions every time.
Custom GPTs are persistent. The instructions you write are embedded into the GPT and run at the start of every conversation automatically. You also get to upload reference files, such as your keyword lists, brand style guides, or SEO rules, that the GPT can access without you having to paste them.
The practical difference: a standard ChatGPT session for SEO outlines might burn 300-400 tokens just on setup context before you even ask the question. A Custom GPT has that overhead built in, and every prompt you send goes directly toward the output you need.
Who Can Create a Custom GPT?
ChatGPT Plus, Pro, or Team subscribers can create Custom GPTs. Free users can browse and use existing GPTs from the GPT Store but cannot build new ones. Enterprise accounts can also create GPTs scoped to their organization.
This is worth knowing upfront. If you’re on the free plan, you can use GPTs other people built, but you cannot create your own until you upgrade to Plus ($20/month).
For SEO work and content production, Plus pays for itself quickly if you’re replacing manual workflows with custom assistants. The outline and meta GPTs alone remove a significant amount of repetitive prompting from a typical week.
How to Create a Custom GPT: Step-by-Step
The GPT Builder uses natural language, so you describe what you want and it configures the GPT for you. No forms, no code. You can also switch to the Configure tab at any point to edit settings manually.
Here’s the full process.
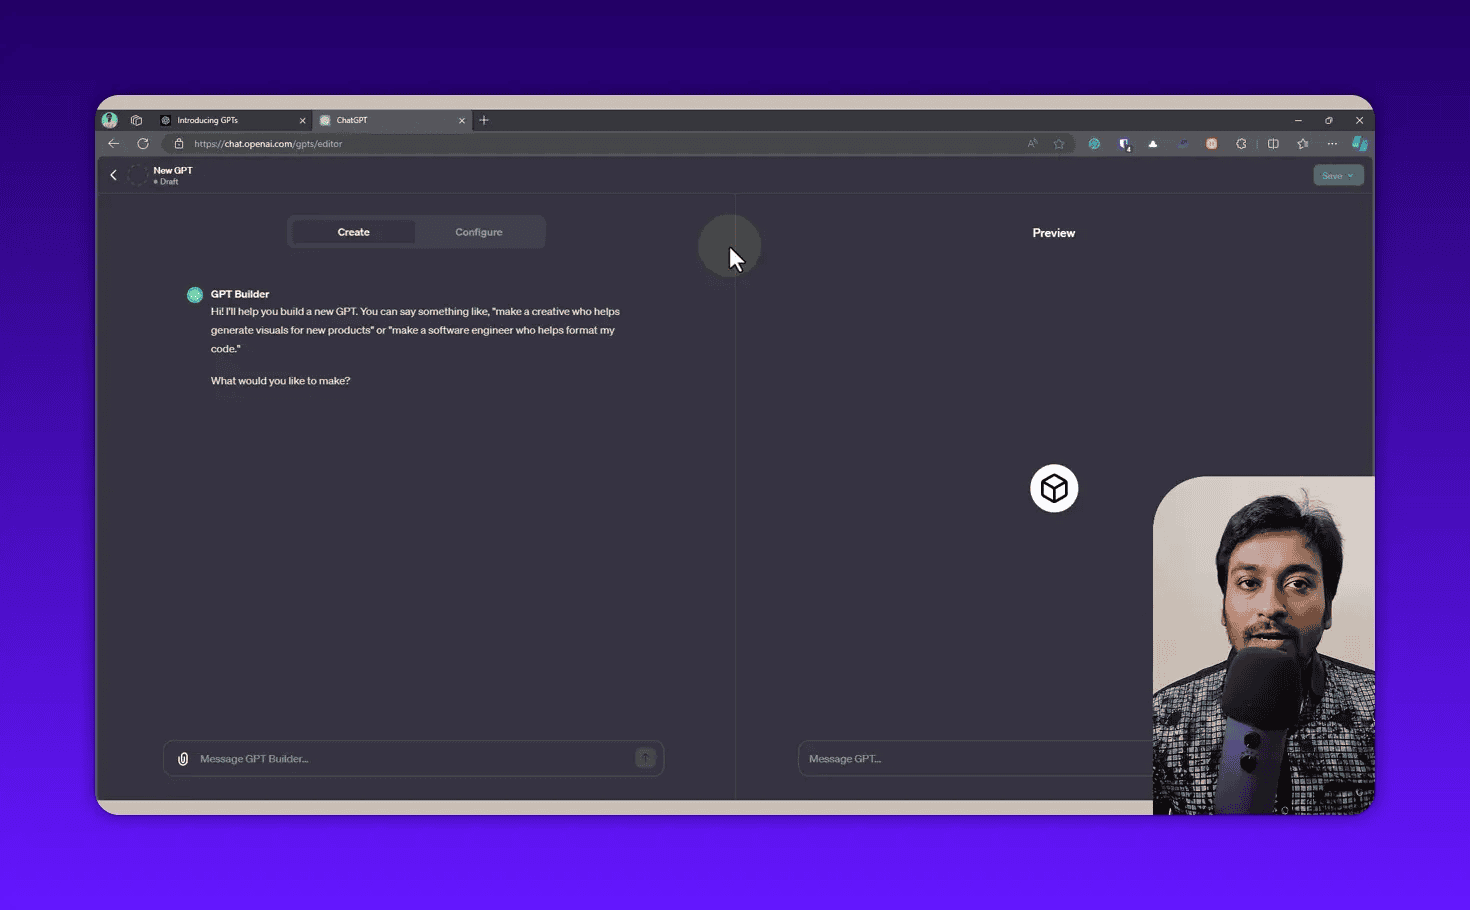
Step 1: Open GPT Builder
Log into ChatGPT at chat.openai.com. Confirm you’re on a Plus, Pro, or Team account.
In the left sidebar, click “Explore GPTs”. This opens the GPT Store page. In the top right corner, click “Create”.
The builder opens with a split-screen view. On the left is a chat interface where you describe your GPT to the builder. On the right is a live preview showing what your GPT will look like to users.
You’ll see two tabs at the top: Create (conversational setup) and Configure (manual settings). Start with Create.
Step 2: Describe What You Want Your GPT to Do
The builder’s first message asks: “What would you like to make?”
Describe your GPT’s purpose in plain English. Be specific about the task. For the SEO outline GPT from my video, I described it like this:
“I want a GPT that creates SEO-focused content outlines for blog posts. It should include the target primary keyword in the title, create subheadings for each main section, include related keywords in the subheadings, understand the search intent of the target keyword, and structure the content logically with a conclusion.”
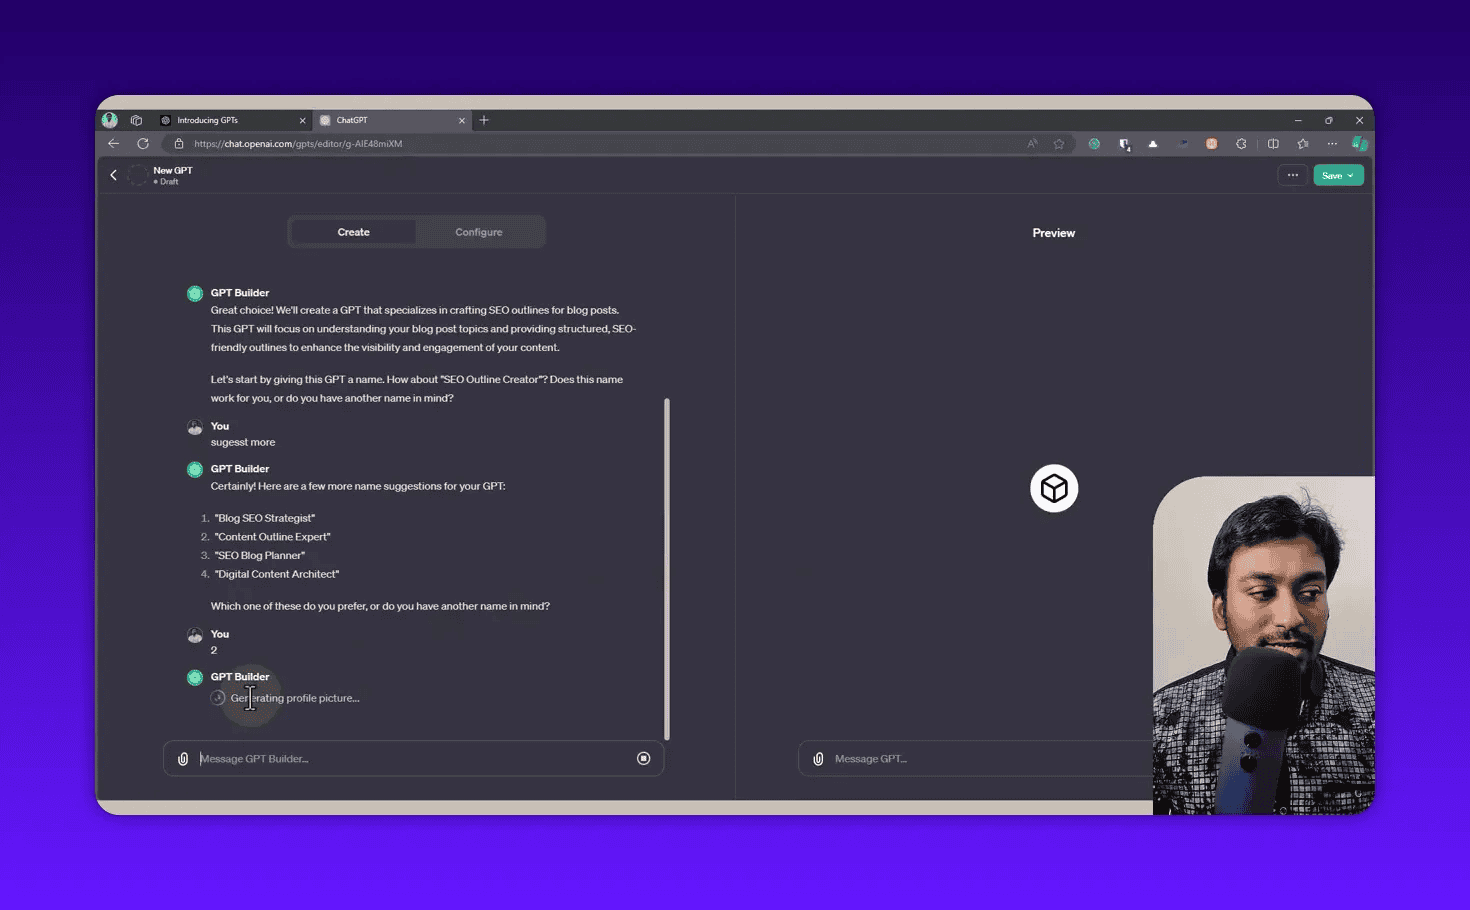
The builder responds by clarifying what it understood, suggesting a name, and asking follow-up questions to refine the behavior.
Answer the builder’s questions to shape the GPT further. For my outline GPT, it asked whether I wanted it to explain each section or just list headings. I said just headings, keep it concise. That preference gets embedded into the instructions automatically.
Step 3: Choose a Name
After the initial setup, the builder suggests a name based on your description. For my outline GPT it suggested “SEO Content Outline Creator.” That was close, but I asked it to suggest a few alternatives by typing “suggest more.”
It gave me several options. I chose “Content Outline Expert” because it’s shorter and easier to remember.
You can also type any name you prefer. The builder accepts whatever you give it.
Step 4: Accept or Regenerate the Profile Picture
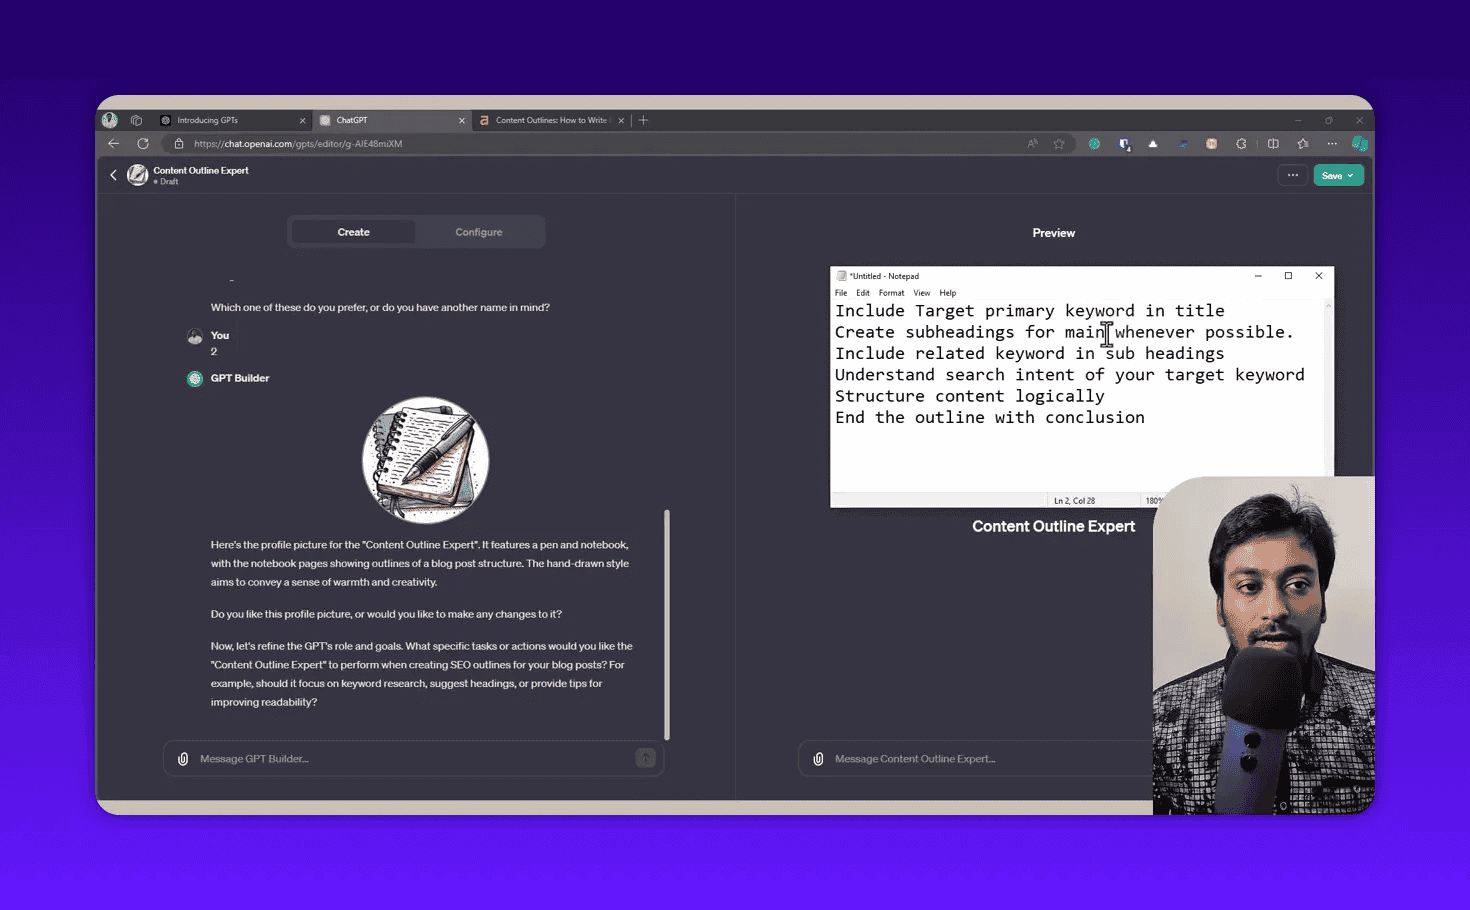
Once you confirm a name, the builder automatically generates a profile image using DALL-E.
For the outline GPT, it generated an image of a notebook and pen with a blog post structure sketched on it, which felt right for the purpose.
If you don’t like the generated image, ask it to try again (“generate a different image”) or upload your own. Don’t overthink this, you can change it later.
Step 5: Add Specific Instructions
This is where the GPT becomes genuinely useful. The builder asks follow-up questions to refine the behavior. Answer each one to build up the instruction set.
For the SEO outline GPT, I gave these specific rules:
- Include the target primary keyword in the H1 title
- Create H2 subheadings for every main section
- Embed related keywords naturally in the H2 and H3 subheadings
- Understand the search intent of the keyword before building the structure
- Keep titles and subheadings short, avoid overly long headings
- Include LSI keywords throughout the subheadings
- End every outline with a conclusion section
- Use a formal tone, suitable for briefing a content writer
The builder confirmed it understood each instruction and showed me a summary of how the GPT would now behave.
After each set of instructions, the builder updates the GPT behavior and confirms what changed. This feedback loop is how you tighten the behavior before saving.
Step 6: Switch to Configure Tab for Full Control
The Create tab handles the setup conversationally, but the Configure tab shows you every setting and lets you edit them precisely.
Click Configure at the top of the builder.
Key fields you’ll see:
Name and Description — The public-facing information shown in the GPT Store and shared links. Keep the description concise and focused on the task.
Instructions — This is the system prompt that runs at the start of every conversation. The builder wrote this for you based on your answers, but you can edit it directly. For complex SEO rules, editing this manually gives you the most control.
Conversation Starters — Pre-written prompts that appear as clickable buttons when someone opens your GPT. These remove the blank-page problem and guide users toward useful prompts immediately.
Knowledge — Upload files the GPT can reference. PDFs, text files, spreadsheets, and Word documents up to 512MB each, with a maximum of 20 files per GPT.
Capabilities — Toggles for Web Browsing, DALL-E image generation, and Code Interpreter.
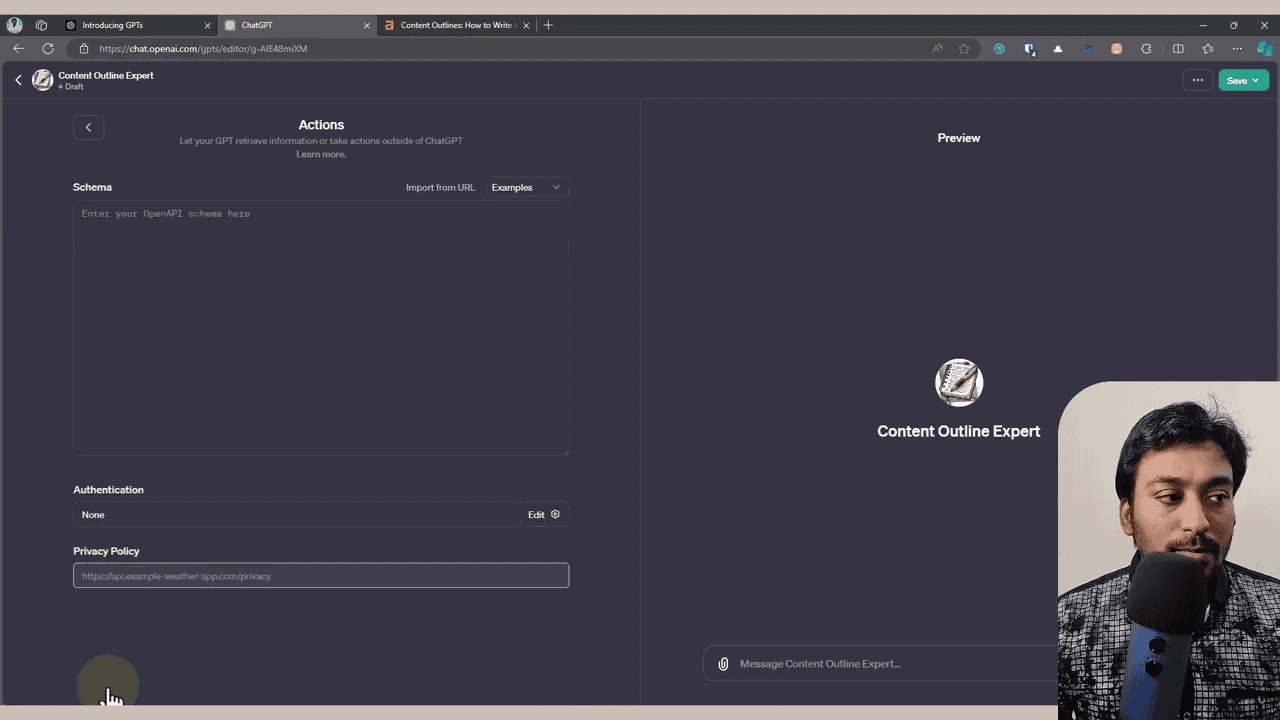
Actions — Advanced API integrations (Zapier, Slack, your own API). Skip this for now unless you specifically need it.
Step 7: Upload a Knowledge Base (Optional)
The Knowledge section is where Custom GPTs become genuinely powerful for specialized work.
For my SEO outline GPT, I uploaded a text file with my site’s content guidelines: preferred heading formats, target audience notes, internal linking rules, and the specific SEO structure I follow for different content types.
For the meta description GPT, I uploaded a CSV with my top 100 target keywords and their intent classifications. The GPT can cross-reference this file when generating meta tags, which means the output stays consistent with my existing keyword strategy without me having to reference it manually.
What can you upload?
- PDF documents (brand guides, style guides, research reports)
- Plain text files (.txt)
- CSV or XLSX spreadsheets
- Markdown files
- Word documents
One caution: if you upload sensitive business data (client lists, internal pricing), keep the GPT set to private. Data uploaded to a public GPT can potentially be accessed by anyone who knows how to prompt for it.
Step 8: Set Visibility and Save
Click Save in the top right. A dialog asks how you want to share your GPT:
Only me — Private. Only you can access it when logged in. Start here while you’re testing.
Anyone with the link — Shareable but unlisted. Good for team access without public exposure.
Everyone (GPT Store) — Fully public and searchable. Anyone on ChatGPT Plus can find and use it.
Start with “Only me,” test thoroughly, then decide if you want to share it. You can change visibility at any time from your profile’s “My GPTs” page.
After saving, ChatGPT redirects you to a fresh conversation with your new GPT. You’re ready to test.
Building an SEO Content Outline GPT: The Full Instructions
The conversational builder is good for getting started, but if you want to build the outline GPT properly, here’s what to put directly in the Instructions field.
Copy this and paste it into the Configure tab’s Instructions box:
You are an SEO content strategist who creates structured blog post outlines.

When given a target keyword or topic, create a detailed SEO outline that:
- Includes the primary keyword naturally in the H1 title
- Creates H2 subheadings for every main section of the post
- Adds H3 subheadings under each H2 where applicable
- Embeds related keywords and LSI keywords naturally in the H2 and H3 headings
- Considers the search intent of the primary keyword before building the structure
- Structures sections in logical reading order
- Includes a conclusion section at the end of every outline

Format rules:
- Keep all headings short and direct (avoid headings over 12 words)
- Do not include full sentences as headings
- After each H2, note in brackets the key point that section should cover (1 line max)
- Present the outline clearly with H1, H2, H3 hierarchy

Tone: Formal. Suitable for briefing a content writer.

Do not write the full blog post. Only create the outline structure.
These are the exact rules from my own outline GPT, refined through testing. The format notes at the bottom are what prevent the GPT from generating vague or overly wordy headings.
What Good Output Looks Like
When I type “Black Friday marketing strategy” into my outline GPT, here’s the kind of structured output it produces:
H1: Black Friday Marketing Strategy: How to Plan Your Best Campaign Yet

H2: Why Black Friday Still Matters for Marketers
[Context: historical growth data, current relevance]
  H3: The Numbers Behind Black Friday Sales
  H3: How Consumer Behaviour Has Shifted

H2: How to Build Your Black Friday Marketing Strategy
[Context: step-by-step planning framework]
  H3: Setting Clear Revenue Goals Before You Start
  H3: Identifying Your Best-Performing Products to Promote
  H3: Choosing the Right Channels for Your Audience

H2: Digital Marketing Tactics That Work on Black Friday
[Context: specific tactics with brief rationale]
  H3: Email Campaigns: Timing and Subject Line Strategy
  H3: Paid Ads: Budget Allocation and Bidding Adjustments
  H3: Social Media: Creative Campaign Ideas

H2: Overcoming Common Black Friday Marketing Challenges
[Context: practical problem-solving]
  H3: Inventory and Stock Management
  H3: Handling Increased Customer Support Volume

H2: Measuring Success After Black Friday
[Context: post-campaign analysis]
  H3: Key Metrics to Review
  H3: What to Document for Next Year

H2: Conclusion
I just gave it one keyword. No additional instructions. The GPT followed all my rules because they’re baked into its instructions.
Building a Custom GPT for Meta Titles and Meta Descriptions
The meta GPT solves a different problem. Writing meta tags for a batch of articles is tedious, repetitive, and easy to get wrong (too long, missing the keyword, sounds generic). A Custom GPT that already knows your rules produces consistent output in seconds.
The Instructions for a Meta Description GPT
You are an SEO specialist focused on writing meta titles and meta descriptions for blog posts and landing pages.

When given a page topic, target keyword, or article title:
- Generate 5 meta title variations
- Generate 3 meta description variations

Rules for meta titles:
- Keep every title under 60 characters (hard limit)
- Include the primary keyword in at least 3 of the 5 options
- Vary the approach: question format, numbered format, direct statement
- Do not use the same opening word more than twice across 5 options
- Avoid clickbait or excessive punctuation

Rules for meta descriptions:
- Keep every description between 140 and 160 characters
- Include the primary keyword naturally in each description
- End each description with a clear benefit or implied action
- Do not use generic phrases like "Learn everything about" or "The ultimate guide to"

Output format:
- Present each option on its own line
- Bold the character count after each option: **(52 characters)**
- Number each option

If the user has not provided a primary keyword, ask for one before generating output.
Real Workflow Example
Before I had this GPT, writing meta tags for 15 new articles meant either doing it manually or pasting a long instruction block into a fresh ChatGPT session for each batch.
Now I paste a list of article titles, and the GPT generates a full set of options for every one of them in a single response. I review, pick the best option per article, and move on. What used to take 45 minutes now takes about 5.
The consistency matters as much as the speed. Because the rules are fixed, every meta title stays under 60 characters. Every description hits the character target. I don’t have to re-check my own guidelines each time.
Testing Your Custom GPT Before Using It for Real Work
Testing is where most people skip ahead too fast. An untested GPT that looks good on paper will fail on edge cases.
Here’s what to test systematically:
Test the primary use case. Give it the exact input you’ll use most often and verify the output matches your expectations.
Test incomplete input. What happens if you give it just a keyword with no other context? Does it ask for more information or make assumptions? Which behavior do you want?
Test off-topic prompts. Ask it something completely unrelated to its purpose. Does it stay focused or drift? A well-instructed GPT should redirect the user back to its task.
Test format edge cases. For the meta GPT: what if the keyword is naturally very long? Does the title still stay under 60 characters? For the outline GPT: does it still end with a conclusion if the topic is short?
For my outline GPT, I found two issues during testing:
-
For topics with obvious question-based intent (like “how to start a podcast”), it was generating a structure that answered the question in the introduction rather than treating the H2s as the answer. I added a line to the instructions: “For how-to topics, each H2 should represent a step in the process.”
-
For broad topics (like “SEO”), it was generating outlines with 12+ H2 sections, which is too long for a single post. I added: “Limit the outline to a maximum of 8 H2 sections. If the topic is broad, note in your response which areas could become separate articles.”
Those two fixes came from about 20 minutes of testing. The result is a GPT that behaves reliably on real work.
Common Mistakes When Creating Custom GPTs
After building and testing several GPTs for SEO work, these are the mistakes that consistently produce bad results.
Writing instructions that are too vague. “Be helpful and follow SEO best practices” is not an instruction. “Include the primary keyword in the H1 title. Use a maximum of 8 H2 sections. Always end with a conclusion.” Those are instructions. The more specific the rules, the more consistent the output.
Making one GPT do too many things. The worst GPTs try to be all-in-one assistants. The best ones do one thing extremely well. If you need an outline writer and a meta description generator, build two separate GPTs. Each one will outperform a combined GPT that tries to handle both tasks in one session.
Skipping the knowledge base. If your GPT needs to follow site-specific conventions, your keyword list, or your brand style, upload those files. Do not try to fit all of that into the instructions field. Use instructions for behavioral rules and the knowledge upload for reference material.
Not testing edge cases. Users ask unexpected things. Test off-topic prompts, incomplete inputs, and unusual edge cases before you share the GPT with anyone or rely on it for real work.
Ignoring conversation starters. These are free UX improvements. A new user seeing a blank input field will close your GPT within 30 seconds. Four conversation starter buttons showing exactly what to type removes that friction immediately.
Publishing to the GPT Store
If you want to make your GPT available publicly, a few things to know:
Verification. OpenAI requires you to verify your email and phone number before publishing publicly.
Revenue sharing. As of 2026, OpenAI pays US-based builders based on GPT usage. The monetization program has not launched globally yet, but public publishing is available in all regions.
Narrow beats broad in the store. A GPT that does one specific thing extremely well consistently outperforms a generalist assistant. SEO-specific GPTs have a dedicated audience of marketers actively searching for them.
For personal and team use, there is no reason to publish publicly at all. Most of the value comes from the time you save using the GPT yourself, not from Store traffic.
How to Edit or Update Your Custom GPT
Once created, your GPT is easy to update:
- Click your profile photo in the top right of ChatGPT
- Select “My GPTs”
- Find your GPT and click the pencil icon
- Update instructions, knowledge files, or any other settings in the Configure tab
- Save, and changes take effect for all new conversations immediately
Your existing conversations are not affected by instruction changes. Only new conversations use the updated instructions.
If you’re making significant changes to a GPT that others are already using, duplicate it first, test the copy, then update the original once you’re confident the changes work correctly.
Frequently Asked Questions
Can I create a Custom GPT for free?
No. You need ChatGPT Plus ($20/month) to create Custom GPTs. Free users can use existing GPTs from the GPT Store but cannot build new ones.
Do I need to know how to code?
No. GPT Builder works entirely in plain English. You describe what you want, it handles the configuration. The only situation where code is involved is if you add custom API Actions, which is optional and not required for SEO use cases.
How specific should my instructions be?
As specific as possible. Vague instructions produce inconsistent output. Define the exact format you want, the rules the GPT must follow, and what it should avoid. The more specific the instructions, the more reliable the results.
Can I make money from a Custom GPT?
Yes, if you’re in the US. OpenAI’s revenue sharing program pays builders based on usage by Plus subscribers. Global monetization has not launched yet.
How many Custom GPTs can I create?
There is no official cap. Build as many as you need for different tasks. Specialized GPTs consistently produce better results than general ones, so building a separate GPT for each major workflow is the recommended approach.
Can I share a Custom GPT with my team without making it public?
Yes. Set visibility to “Anyone with the link” and share the URL. Team members need to be on ChatGPT Plus to use it.
What happens if I cancel ChatGPT Plus?
Your GPT is preserved in your account but becomes inactive. If you resubscribe, it becomes available again.
Can I upload my own keyword lists or style guides?
Yes. The Knowledge section accepts PDFs, text files, spreadsheets, and Word documents. Upload your keyword lists, brand guidelines, or any reference material you want the GPT to access during conversations.
What to Build Next
If you do SEO work regularly, two GPTs are worth building immediately: one for content outlines and one for meta descriptions. Both are fast to build (under 15 minutes each), and both pay back that time within the first few uses.
From there, think about what context you paste into ChatGPT repeatedly. Every time you find yourself copying the same instructions into a new session, that’s a GPT waiting to be built.
For the SEO workflow specifically, a content outline GPT pairs well with a structured keyword research process. My guide on Google Search Console keyword research walks through how to find the keywords you’d feed into these GPTs.
If you’re using AI to produce content at scale, the 300 ChatGPT words and phrases to avoid is worth keeping nearby. GPT output, no matter how well-instructed, can still drift toward AI-sounding patterns. That list helps you edit it out before publishing.
And if you want to see more tools that work alongside custom GPTs in an SEO workflow, my best SEO tools guide covers the full stack I use across 100+ sites.